I was given a proper solar filter for my birthday about 1,5 month ago and I hadn’t taken a single photograph through it. Until today. Today, around noon, I took this (pretty awesome) picture of the Sun:

40 frame stack of the Sun at the 21st of nov. 2014, 12.00 GMT+1, as seen from Enschede
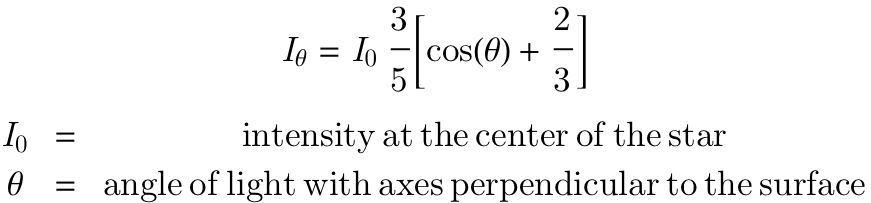
In this image (which I colored yellow-orange-ish because you probably feel more familiar with a yellow sun than a white one), the outer regions of the Sun appear clearly less bright than near the center. This is a well studied effect and is called ‘limb darkening’. In the Eddington approximation, the intensity depends on the angle between the outgoing light and the axis perpendicular to the surface. The equation that describes this intensity is not more difficult than one cosine and 2 fractions:
In the figure below, I have added 3 blue bars on the Sun’s disk, with their corresponding angles. The intensities given by measuring the mean pixel values that my DSLR gives me, are probably not the most accurate, but they are the best I can do (the intensity gradient is probably altered by the used solar filter and the DSLR settings). I have normalized the mean values with the maximum pixel value of 255 so that my measured values become 0.72 in the center, 0.60 at 71% of the radius and 0.28 at the edge of the Sun.
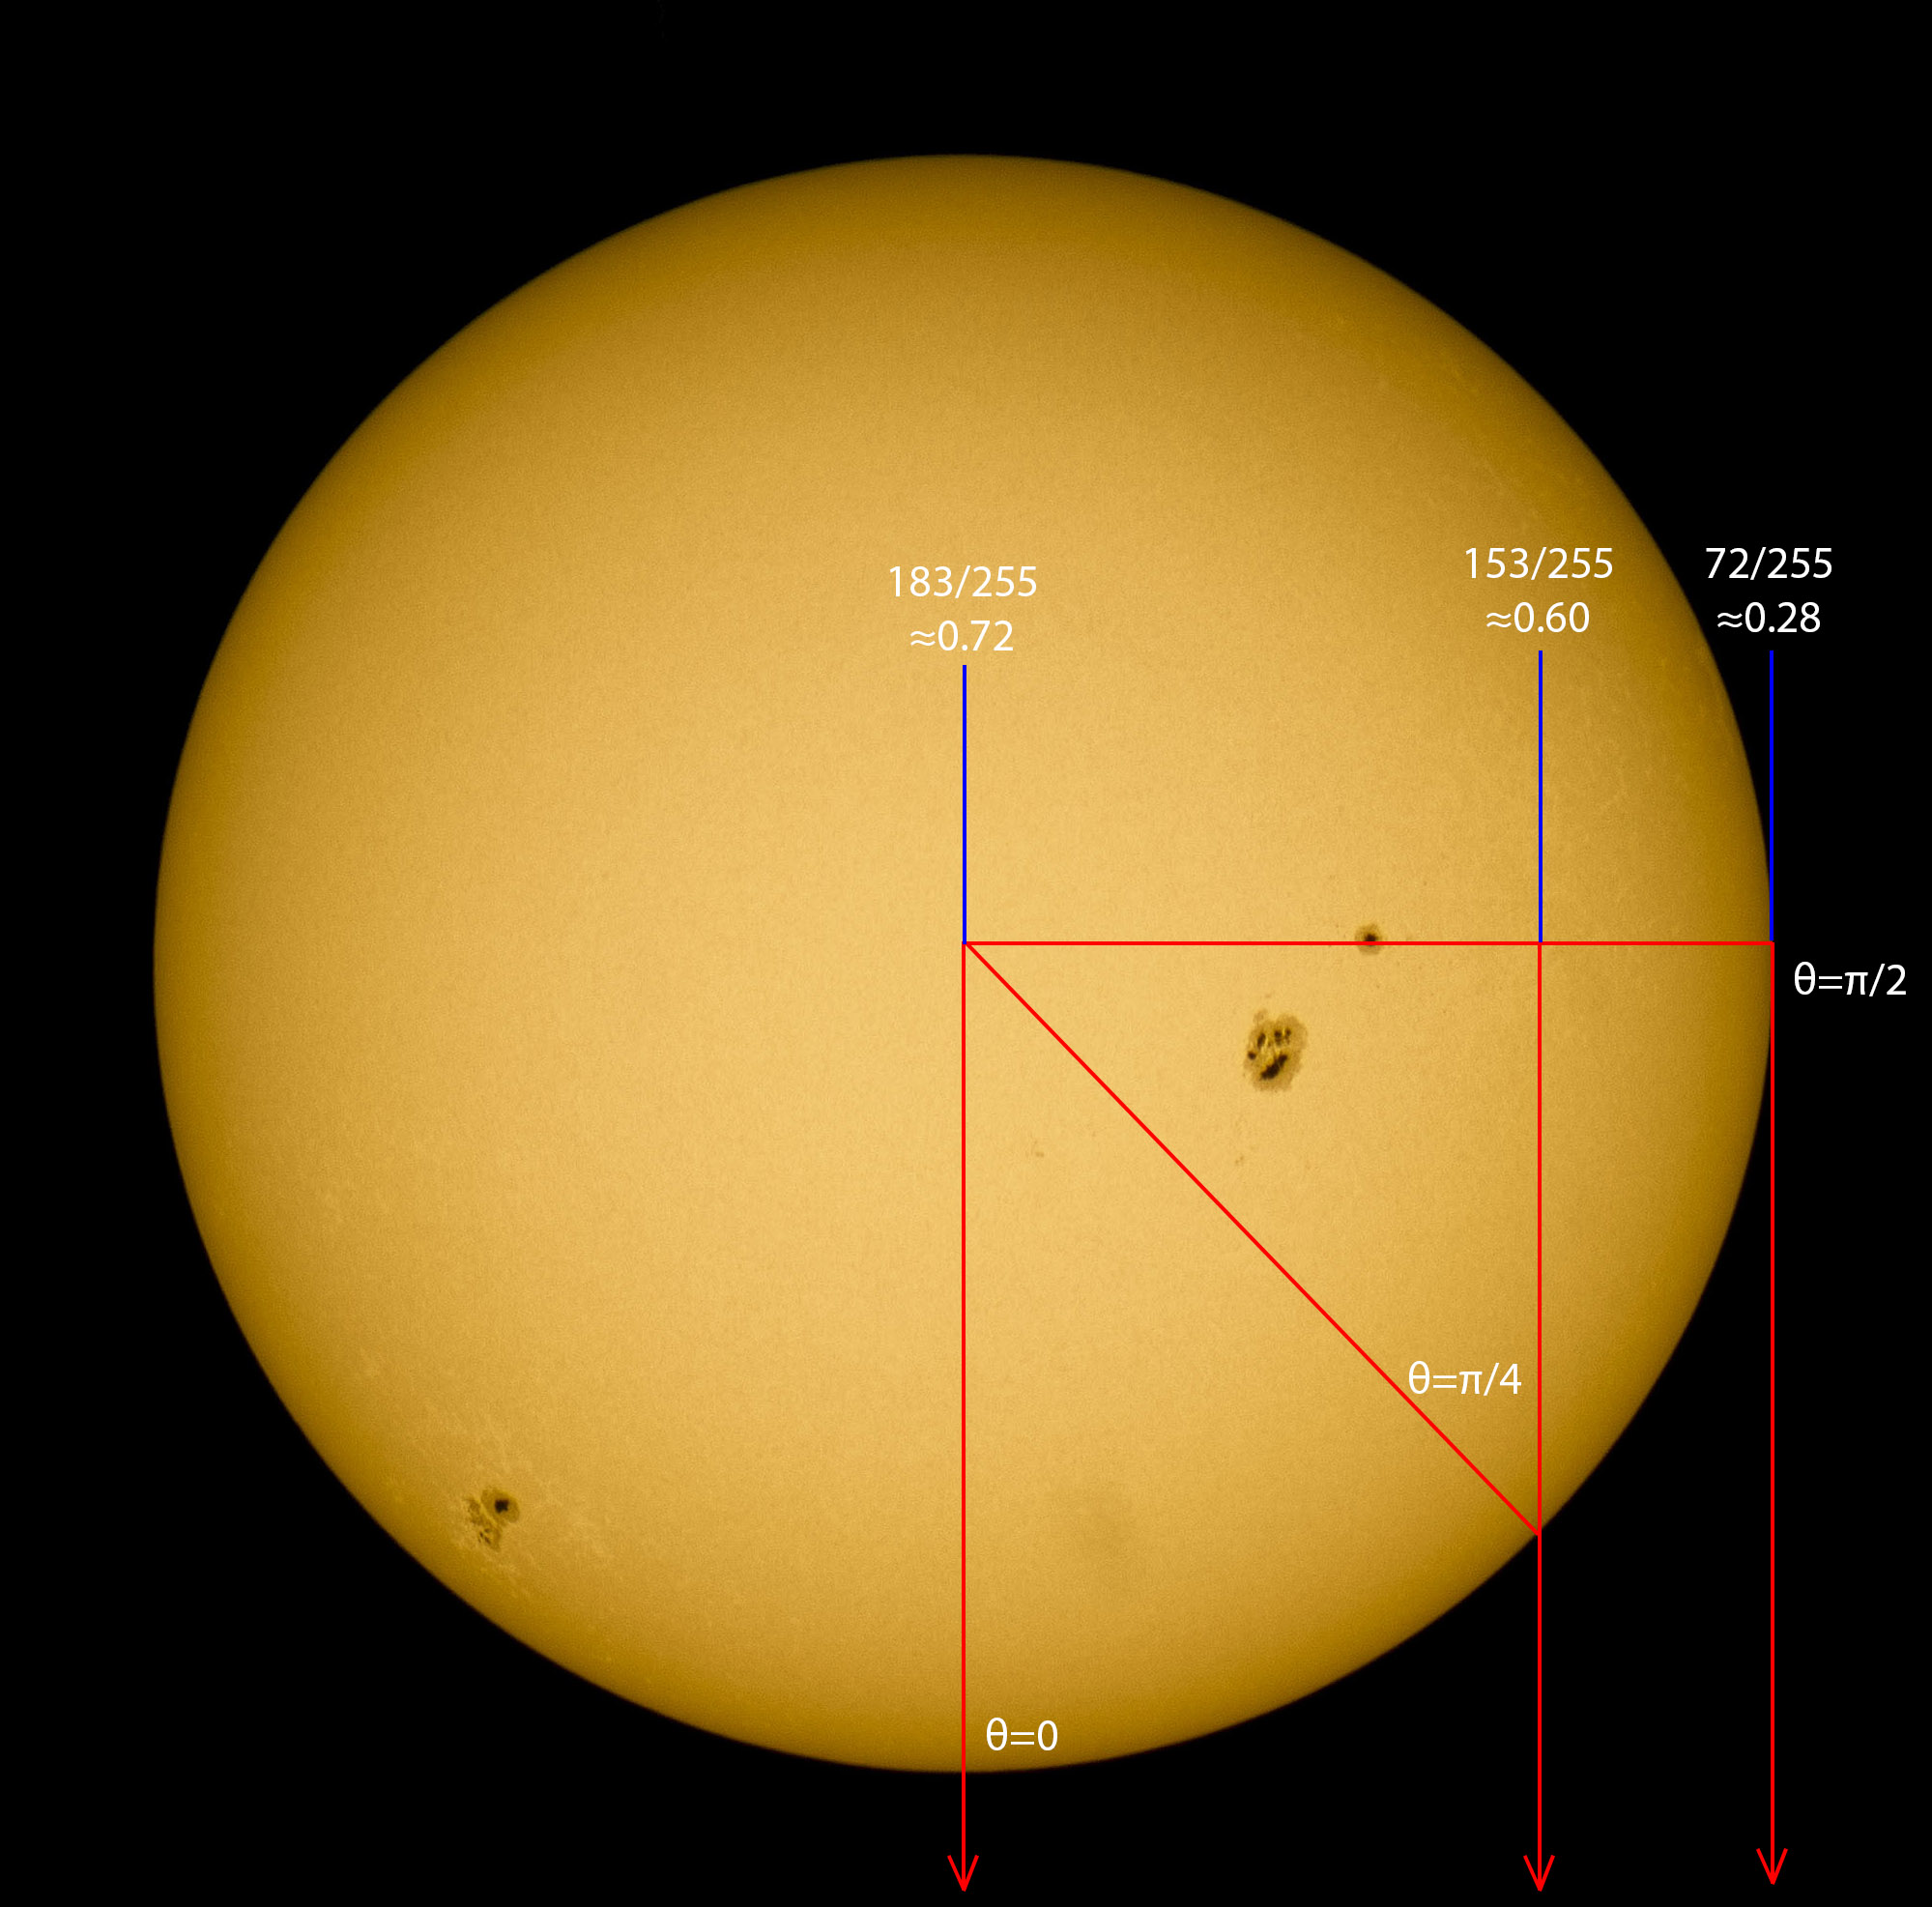
Measured intensities at different angles
In the table below I have listed the measured values and those given by the equation I showed you. The fact that the value for theta=0 is the same was to be expected since I used this as the center intensity. The fact that the other 2 values correspond very good however, comes as quite a surprise. I didn’t really expect it to be this accurate, but the changes in contrast caused by the equipment and software seem to balance out pretty good.

Anyway, I just wanted to show you that the predicted limb darkening is apparent in the photo I made 🙂